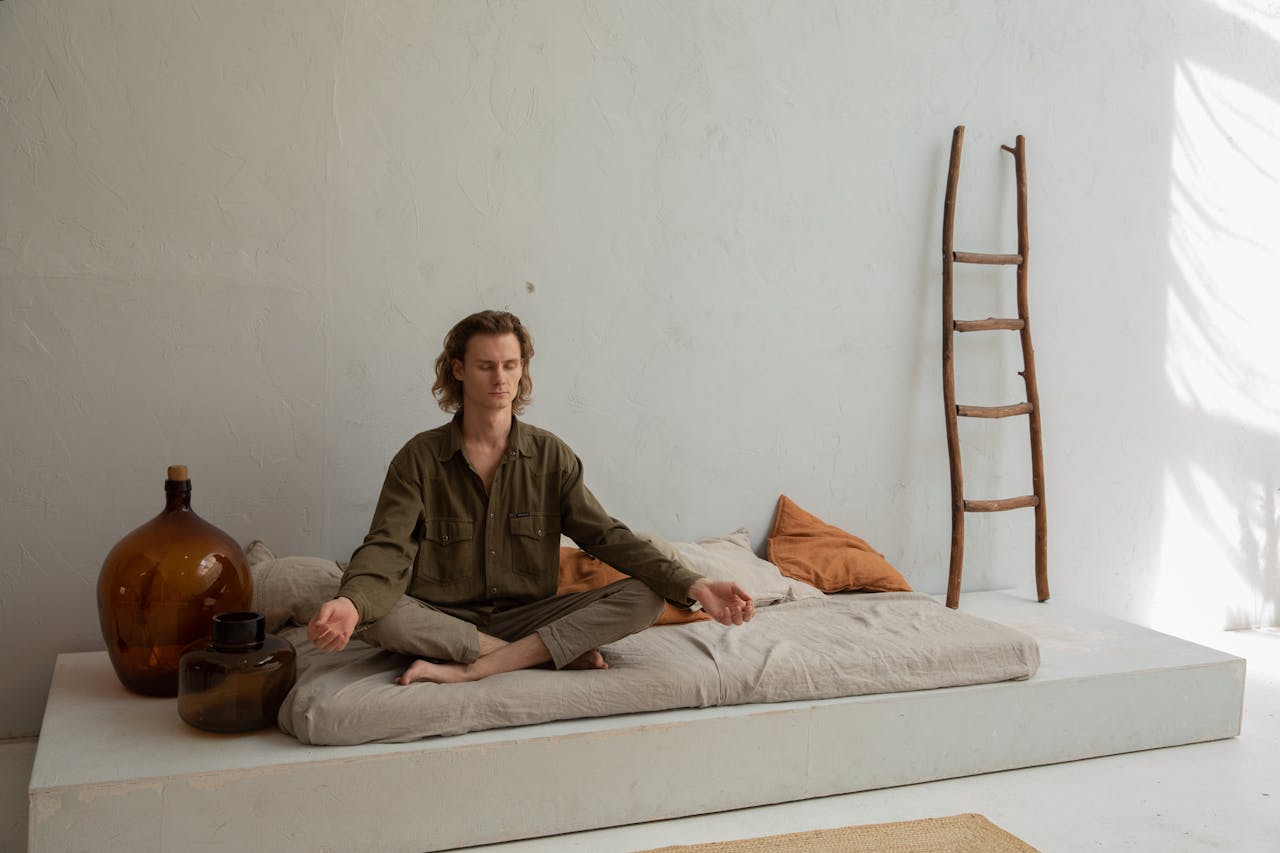
If thinking of attending a yoga class for teens, it may be helpful to learn some basic poses and actions beforehand. It can instill confidence and may help a teen decide whether or not they want to continue practicing yoga.
You can try the exercises yourself first, with a yoga teacher, and then teach them if you have a teen. Or your teen can read the instructions for themselves and then attempt the exercises.
Note that perfection isn’t required. Instead, read the instructions, try out the exercise, then re-read the instructions to see what you’ve missed.
The following exercise helps to build some basic elbow and shoulder awareness. You may only need to do the elbow awareness exercise once or twice. As well as building awareness, the shoulder exercises can be exercises in their own right.
Basic Elbow Awareness Exercise
Focus on one arm and straighten your elbow. Then bend it slightly. Repeat a few times while memorizing the feeling in your elbow when it is straight. Repeat with the other side.
Note, repeat the action slowly and smoothly.
Basic Shoulder awareness
 Following are four basic movement exercises for the shoulders. These can be used as a warmup for the shoulders for any activity, including yoga.
Shoulder Lift:
With arms down, lift your shoulders. Lift them as high as possible. Pause and then slowly release.
When keeping the shoulders lifted, imagine that you can continue to lift them higher.
Repeat a few times.
Shoulder Depression:
Now do the opposite. Pull your shoulders down. The amount of movement will be small, but there should be a noticeable feeling of muscles activating. Pause and then relax. Repeat a few times, focusing on a slow and smooth activation and relaxation.
Shoulders Forwards (Scapular Protraction)
With arms down by your sides, move your shoulders forwards. Pause and relax. Repeat a few times. Focus on feeling your shoulder blades move apart each time you move your shoulders forwards. Feel them moving slightly inwards when you relax.
Shoulders Back (Scapular Retraction)
Next, move your shoulders back. Notice the way your shoulder blades move towards each other. There should also be a strong feeling of muscle activation between your shoulder blades and spine. Relax and repeat.
Arm Lift
You can use this exercise as an overhead shoulder exercise. You can also use it as a preparation for downward-facing dog and in preparation for sun salutations.
Reach one arm above your head.
-
Lift your shoulder. Feel your shoulder blade lifting. Also, notice your collar bone lifting. Relax and repeat a few times.
-
Next, after lifting your shoulder, straighten your elbows. Relax and repeat.
-
Finally, add the wrist, palm, and fingers. Lift your shoulder, straighten your elbow, open your palm, and spread your fingers, making them feel long at the same time.
Repeat this a few more times and then do the same with the other arm.
Chest Lift
For teens of either sex, low self-esteem may be reflected and reinforced by a sunken chest. You can use this chest lift exercise to increase awareness and control of the upper torso and ribcage. It may also help to instill confidence and lead to better posture.
You can do this exercise while sitting or standing upright.
Focus on the sternum. Lift your sternum. Note the way your front ribs feel as they lift. See if you can feel the backs of your ribs pulling down.
Relax and then repeat.
Once you get a feel for your back ribs pulling down, you can try to drive the lifting of your sternum by deliberately creating a downwards pull on the backs of your ribs. You can turn this into a breathing exercise if you do this repeatedly. Pull your back ribs down to cause an inhale. Relax to cause an exhale.
This exercise can also strengthen your back muscles.
Chest Drop
A compliment to the chest lift is the chest drop.
Sitting or standing upright, pull the sternum and front ribs down. It is possible to relax and let your ribs sink. Instead, make the action active. Feel your abdominal muscles pulling down on your front ribs.
Relax and repeat.
If you experience low back pain, stop the forward bend before the onset of discomfort. If that fails, leave this exercise out.
Standing Front-to-back Weight Shift
Weight shifting is a simple way of learning to feel and control your center of gravity. It can bring you more in touch with your body.
Stand with feet a comfortable distance apart and knees slightly bent.
Keeping your spine erect, shift your body forwards. Notice the way your forefeet and toes press into the floor. Shift back just enough that you can relax.
Repeat a few times, going slowly and noticing how a shift in pressure in your feet occurs as your shift your upper body forwards and back relative to your feet.
Once you have a basic feel for changes in pressure, the instructions can be more specific.
Shift your weight forwards far enough that your forefeet and toes press down with even pressure.
Pause, maintaining even pressure.
Then shift back to the back edges of your heels. Pause with your weight over the back edges of your heels.
You may find you wave your arms back or forwards to stay balanced. That’s fine.
Repeat, pausing in either position.
Another option is to shift weight between the front of your feet and the middle. Your heels and forefeet press down with even pressure for the middle position.
Shift forwards so that toes and forefeet press down evenly.
Then shift back so that forefeet and heels press down evenly. Repeat.
Front-Back Weight shifting meditation
You can turn weight shifting into a meditation. The key is to vary the speed and rhythm so that the exercise is smooth, calming, and naturally relaxing.
Note that part of the rhythm in the exercise below is to relax for the fourth part.
This is a four-part exercise!
-
Shift your weight to your forefeet and toes.
-
Lift your heels.
-
Keep your weight forwards and lower your heels.
-
Shift your weight back (heels and forefeet.)
Repeat.
Note that an aspect of weight shifting is recognizing when part of your foot is only lightly touching the floor. And so, when shifting forwards, you can notice when you’ve shifted far enough forwards that your heels only lightly touch the floor. Then you can lift them. When setting your heels back down, keep your weight forwards so that you can lightly touch your heels down. Pause here. Then shift your weight back.
Lateral Weight Shift
For the lateral weight shift, start with weight on both feet and knees slightly bent. You can vary foot position so that feet are parallel or turned out to varying degrees.
From center, shift to one foot. Keep your torso upright. Shift your pelvis, ribcage, and head to one side as one unit.
Notice how the foot you are shifting towards presses down with more pressure and the other foot with less.
Repeat a few times to the same side and then switch.
Lateral Weight Shift with a Foot Lift.
Next, add a foot lift. Shift to one foot. Then try to lift the other foot without further shifting your upper body. You may notice the foot and ankle of your standing leg stiffening as you try to lift your other foot. Lift the foot just high enough that you no longer feel skin contact. Pause, then put the foot back down. Then shift to the center.
This, too, can be turned into a meditation
-
Shift to one foot.
-
Lift the other foot.
-
Touch the foot down.
-
Shift weight to both feet.
This can be repeated to the same side a few times.
Centering your weight
When practicing the lateral weight shift, whether including a foot lift or not, one thing you can do when shifting weight to both feet is to adjust so that both feet press down with even pressure.
If standing in mountain pose, whether feet are together or apart, you can work at standing with even pressure on both feet. You can also choose where to position your weight, either forwards towards toes and forefeet or more central, between forefeet and heels.
Tree Pose
For tree pose, shift your weight to one foot. Shift your weight forwards so that your toes and forefeet press down but keep your heel down. Lift your other foot and place it against your inner thigh. Slowly press your foot against your thigh.
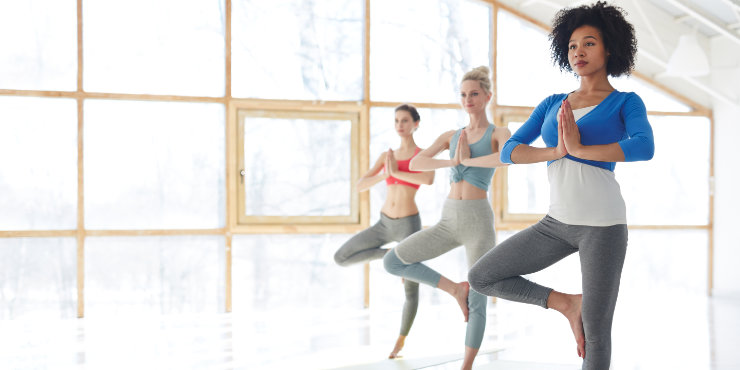
Note how your foot affects your standing leg thigh.
Reach your arms out to the sides or put your hands together in prayer in front of your chest.
Fix your eyes forwards and slightly down, using a gazing point that makes it easier to stay balanced.
Repeat on the other side.
Standing Twist
You can use this standing twist to build awareness of your hip joints, pelvis, waist, and ribcage.
Stand with feet about hip-width apart and knees straight. Draw your ears away from your shoulders so that your head moves back and up and so that the back of your neck feels long.
Turn your hips to face the right. Keep both knees pointing straight ahead as much as possible.
Turn your sternum, and thus your ribcage to the right also. To add a neck twist, turn your head to the right also.
While holding this position, scan your awareness through your body for each breath.
-
Try to deepen the turn of your pelvis while keeping your knees pointing straight ahead.
-
Then try to deepen the turn of your ribcage while feeling both the fronts and backs of your ribs.
-
Then, if turning your head, check that your neck feels long and try to deepen the turn of your head, moving your eyes as far to the right as possible.
Repeat the scan two or three times if possible, and then relax. Take a few moments to unwind before repeating on the other side, if necessary.
Seated lateral weight shift
If stuck in a chair at a desk, you can practice a seated variation of the lateral weight shift.
While sitting on a firm chair, you can shift your ribcage to the right so that your right sitting bone presses down. Then return to the center.
Repeat a few times and then shift to the left sitting bone.
Afterward, try to find the middle position with weight even on both sitting bones.
Seated twist
Another option if stuck in a chair at a desk is the seated twist.
For the seated twist on a chair, try to maintain even weight on both sitting bones. Without using your arms to help, turn your ribcage to the right. Lengthen your neck and turn your head to the right also. Focus on feeling the fronts and backs of your ribs, gradually deepening the turn to the right each time you inhale or exhale.
Repeat on the other side.
As an option, you can try the seated twist in either direction with your weight on one sitting bone or the other.
Seated Pelvic Tilts
Yet another exercise that you can do while seated is a pelvic tilt. Learning the seated version of this exercise first may make it easier to learn while standing.
Sitting close to the front of your chair with feet even on the ground, lift your sacrum so that your pelvis tilts forwards. Keep your torso upright and notice how your lumbar spine bends backward. Return to the starting position. Repeat a few times.
Practice being aware of the change in your pelvic tilt. Alternatively, pay attention to the change in the bend in your lumbar spine.
Next, move your sacrum downwards from the starting position so that your pelvis tilts backward. Notice how your lumbar spine flattens.
Repeat a few times.
Whenever practicing this exercise, work at doing the movements slowly and smoothly.
If doing this exercise while standing, try it with feet a comfortable distance apart. They can be parallel or turned out. In addition, stand with your knees slightly bent.
Upright lunge
The upright lunge is similar to Warrior Pose. You can use it to stretch the front of the hip of the back leg. You can also use it to strengthen the legs.
From a standing position, step one foot back. Keep the back knee straight but bend the front knee.
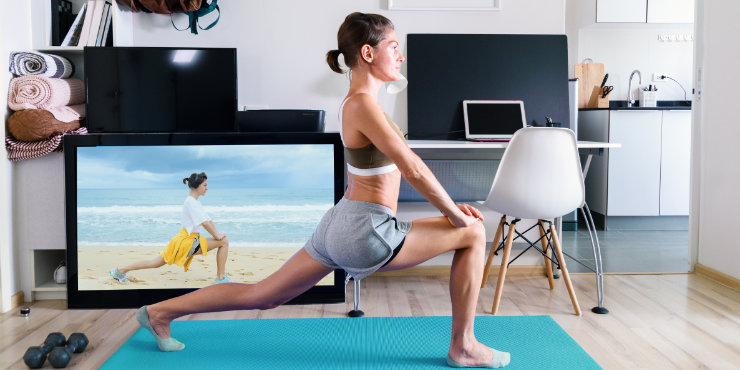
Adjust the position of your feet so that they are about hip-width apart from side to side. In addition, position your feet far enough apart from front to back so that your front knee position is over a point between your toes and midfoot when viewed from the side.
Have your torso upright with arms by your sides (or hands on your front knee).
Try pressing the back foot down without allowing your body to move. Try pressing your front forefoot down without allowing your heel to lift. Alternatively, press down through the front heel without allowing your hips to lift.
The foot pressing actions should cause an increase in leg activation. Hold the activation for a breath or two, and then relax it. Try to activate and relax slowly and smoothly. Repeat two or three times. Then switch sides.
If you are using yoga blocks for your hands, try gradually relaxing your arms after activating your legs. Then reactivate your arms (by pressing down with your hands) when you relax your legs.
Once comfortable using your legs, you can add your arms and chest. First, activate your legs. Then reach your arms up. Then lift your shoulders and straighten your elbows.
If keeping your arms lifted, you can, on occasion, alternate between lifting your front ribs and pulling them down. This arms lifted position makes the pose a bit more like warrior pose.
Pyramid pose
The pyramid pose is a type of standing forward fold that you can use to stretch your hamstrings at the back of the thighs and strengthen your legs.
Stand with one foot forwards and the other back. You can have the feet about hip-width side to side or narrower if your balance is okay. From front to back, have your heels separated about a leg’s length.
Point the front foot forwards. Turn the back foot out a comfortable amount. Both feet can be flat on the floor with the knees straight.
Bend forwards and rest your hands on your front shin. Or, if you have yoga blocks, place them on yoga blocks on either side of your leg. Or, if you can touch the floor with your knees straight, do that instead. Draw your earholes away from your shoulders so that your neck feels long.
You can focus on your front leg initially. Press down through the forefoot without allowing your heel to lift. Relax and repeat. Then try pressing down through your heel without allowing your hips to shift. Repeat a few times, pausing in the relaxed position. You can then repeat this with the back leg.
Switch sides after practicing both legs or switch sides after doing the front leg and then again after the back leg.
When coming out of the pose, experiment with activating one or both legs and keeping the activation while standing up.
Half-moon Pose Weight Shift
A half-moon pose is balancing on one-foot pose. You can do it while balancing on one foot with the bottom hand lifted or with the bottom hand on the floor for extra stability.
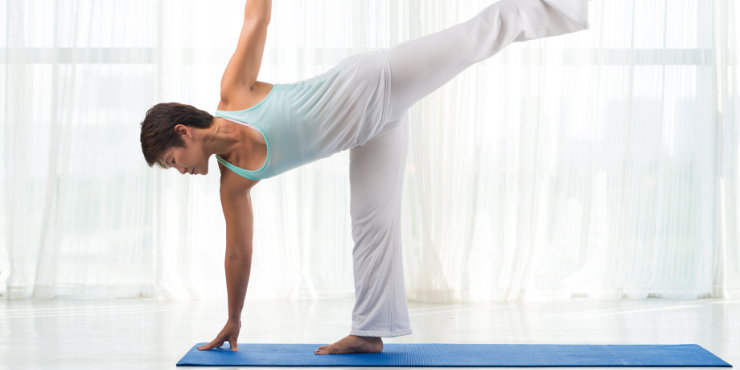
The first version of this pose includes a weight shift when the hand is on the floor.
While standing, turn one foot out ninety degrees. Shift weight to that foot while keeping the hips reasonably square to the front. Bend to that side and place the bottom hand on the floor just ahead of the turned-out foot.
If you can’t touch the floor, use a yoga block or stable chair for your hand, or bend your standing leg knee.
Shift your body forwards so that your hand presses down with greater pressure. Then shift back to your standing forefoot so that your hand relaxes. Repeat a few times, and then add a hand lift after shifting to your forefoot. To lift the hand, keep your torso still and bend your elbow.
Stand up and repeat on the other side.
To get into the pose easier, try to keep weight on your forefoot when reaching your hand to the floor.
This next version involves keeping the body still.
With your hand on the floor, try pressing down through your forefoot without allowing your heel to lift and without allowing your body to shift. Relax and repeat.
Next, try pressing down with your heel. For either option, assuming your weight is over your foot, you can try adding a hand lift.
Modified Downward Facing Dog (adho mukha svanasana)
Next is a basic version of downward-facing dog pose.
Start on your hands and knees with your hands ahead of your shoulders. Push your chest and hips back away from your hands so that your arms and spine form one line when viewed from the side. Adjust the position of your legs so that your knees are beneath your hips or slightly in front of them.
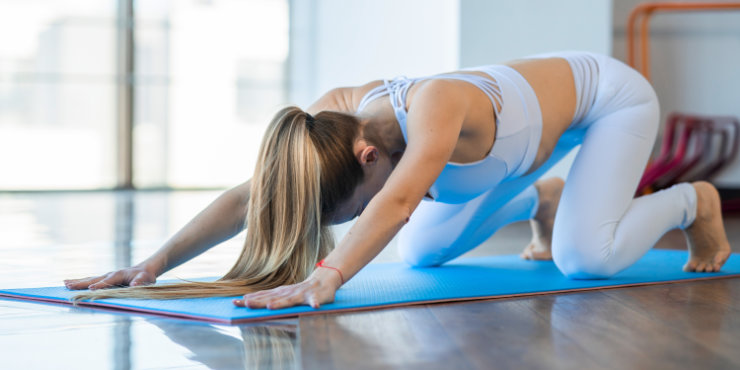
Push the floor forwards with your hands while pushing the floor back with your feet. You may have to push down with your feet and back so that your feet don’t slip. Maintain the tension that results from pushing your hands and feet against the floor, and use your shoulders to move your ribcage further away from your hands. Your ears will come closer to your shoulders as a result.
Hold for five to ten slow breaths and then relax. Repeat three or more times.
While holding the pose, keep your head in line with your arms. Direct your eyes to a point in front of your feet.
To rest in between repetitions, go onto all fours with hands under your shoulders and knees under your hips.
-
Benefits: Downward facing dog pose is an inverted pose, positioning the head below the torso. Focusing on a point between the hands and the feet can make it easier to relax. It can also help open the chest and stretch and strengthen the arms in an arms-over-head position.
-
Risks and contraindications: You should not practice downward-facing dog if you have carpal tunnel syndrome since it places weight on the hands and wrists. You should also avoid it if you have any shoulder or arm injuries.
Table Top
Table top could be considered a compliment to downward-facing dog pose.
-
In downward dog, your arms are equivalently “above your head.”
-
In table top they are equivalently behind your back.
Start in a seated position, with knees bent upwards and feet flat on the floor. Place your hands on the floor behind you with fingers pointing forwards.
Use your shoulders to lift your ribcage. Your shoulder blades will move inwards towards each other. They will also feel like they are moving down your back. Because your hands are on the floor, your ribcage will be moving up relative to your shoulders.
Relax and repeat a few times.
Then, after lifting your chest, lift your hips.
With hips lifted, press into your forefeet without lifting your heels. You can then try pressing into your heels without allowing your hips to lift further. In either case, there should be an increase in muscular activation.
Once you have increased muscle activation, maintain it while gradually lifting your hips and possibly your chest.
Relax and if desired, repeat a few times.
Optionally, try the same pose with fingers pointing back. Be aware that this option, fingers pointing back, can be uncomfortable on the elbows and may require further instruction.
Bound Angle Pose
Bound angle pose or butterfly pose is a seated yoga pose.
Sit with an erect spine, feet together, and knees bent out to the sides. Position the feet close to the front of the pelvis. If this causes knee pain, then move the feet further forewards.
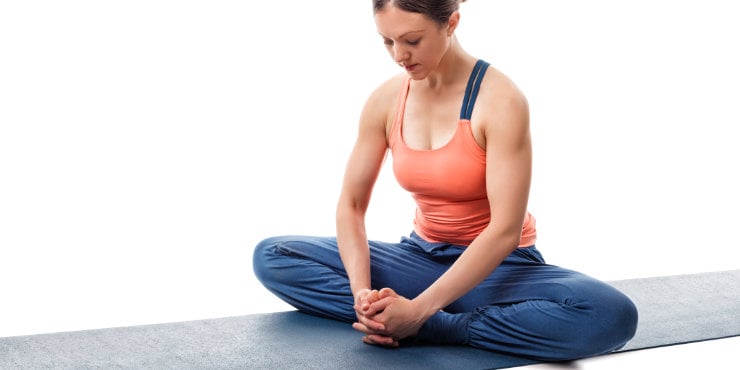
Sit up tall with your spine straight and your hands on the floor behind you. Reach the knees slightly outwards and forwards. You may notice some muscular sensation in your hips or upper thighs. Repeat this action a few times, relaxing and then activating, seeing if it helps you lower your knees closer to the floor.
Bound angle pose can stretch the groin muscles.
A reclining version of this pose can be helpful for girls dealing with menstrual pain.
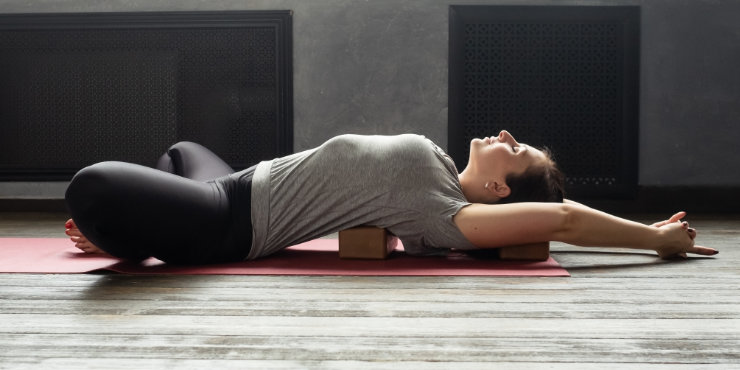
Corpse Pose
When finishing a yoga routine, the final position is corpse pose.
Lie on your back with feet apart and arms by your sides. Turn your palms up. Close your eyes. Rest for a minimum of five minutes.
Benefits of Yoga Poses for Teens
Why should teens do yoga?
Teenagers should participate in yoga practice for a variety of reasons. Combining these yoga asanas with breathing techniques, or pranayamas, can have a tremendous impact on on both body and mind.
-
Yoga helps teenagers cope with anxiety by teaching healthy coping mechanisms. It can also teach them how to deal with problems. Teenagers who practice yoga can experience better emotional stability, mental clarity and improved stress management.
-
Yoga helps teenagers stay focused by teaching them to be in the present moment. They can learn this with clear instructions for yoga poses and other exercises. They can also practice staying relaxed while being gradually exposed to more difficult or more uncomfortable yoga poses.
-
Yoga can help teenagers build self-esteem and improve their body image by helping them learn to feel their bodies.
-
Many physical changes take place during the teenage years. Yoga can help maintain emotional well-being while also dealing with these physical changes.
-
A Yoga session often improves breathing and can help refresh and awaken tired teens. It can help ease anxiety and stress. It may also help with mood swings.
References
The adolescent brain: Beyond raging hormones - Harvard Health
Alternate Nostril Breathing: Benefits, How To, and More.
Yoga for Teens: 3 Yogic Teachings to Combat Bullying.
7 Ways Yoga Helps Children and Teens | Psychology Today Canada.
These Yoga Poses Will Help You Get Through Your Teenage Years.
Yoga: What You Need To Know | NCCIH.
How to Do Bound Angle Pose in Yoga – EverydayYoga.com.
Disclaimer
The contents of this article are provided for informational purposes only and are not intended to substitute for professional medical advice, diagnosis, or treatment. It is always recommended to consult with a qualified healthcare provider before making any health-related changes or if you have any questions or concerns about your health. Anahana is not liable for any errors, omissions, or consequences that may occur from using the information provided.