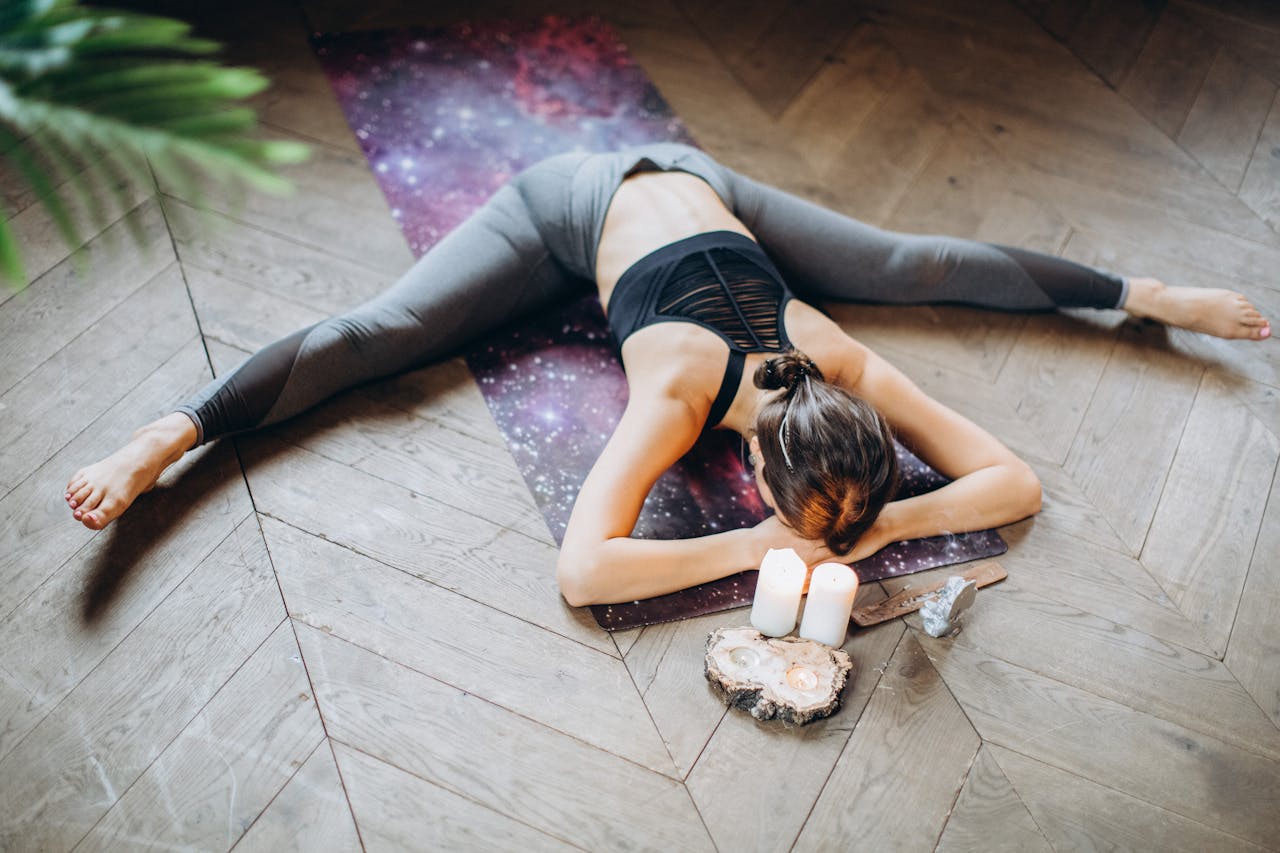
In Yin yoga, you hold poses for three to five minutes, focusing on relaxing the muscles you are stretching. Thus, you stretch the connective tissue within and around the muscle, which connects to it. Read on to find out a little bit more about yin yoga poses. Also included are some basic yin yoga poses that you can do at home.
Yin Yoga Poses can be uncomfortable
Yin yoga poses can be very uncomfortable, mainly if you aren’t used to stretching. As a beginner, you can work towards holding poses for longer.
The benefits of yin yoga include:
-
Stretches connective tissue, which is good for passive flexibility.
-
Releases tension.
-
It provides a nice compliment to yang yoga poses, where the focus tends to be on activating muscle tissue.
-
It turns on the relaxation response, which is helpful for destressing.
-
Improves body awareness.
In addition, Yin yoga tends to be a reflective practice because you hold poses for so long.
The Difference Between Yin and Yang styles of yoga
Yin and yang are terms taken from Traditional Chinese Medicine (often shortened to TCM). One way to view yin is an inwards movement of energy while yang is outwards. We could also say that yin is receptive while yang is expressive.
One way to compare yin and yang styles of yoga is that yin yoga is more about listening to your body while yang is more about controlling it.
How to Gently Stretch Connective Tissue
One of the simplest pieces of advice for people new to yin yoga and even for more seasoned practitioners is to move smoothly, slowly, and gradually into a yin yoga posture.
We can do something as we hold a stretch and move deeper into it to make adjustments.
This is particularly important when dealing with our joints. We can position and reposition elements of our body so that the connective tissue that crosses our joints and makes them up isn’t unduly tensioned.
What Not to Relax When Doing Yin Yoga Poses
While the general suggestion is to focus on relaxing when doing yin yoga postures, there are two simple actions that you may find to help make your yoga practice more effective.
One simple action is to make your spine feel long.
This action can help anchor your hip bones, and if stretching the legs, you may find it easier to deepen the stretch.
Another action that you can do, particularly when working on a leg stretching yin pose, is to play with the posture and level of activation of your foot, toes, and ankle. In each case, notice its effect on the pose in general. Use the option that feels best at the time, noting that it may change.
When to practice yin yoga poses?
The best time to practice yin yoga is when you have time. If you have the choice, you may find it highly beneficial to have a regular practice in the morning.
If you live in a cold climate, or it is wintertime, you may find it more practical to practice in the afternoon.
Of course, if you are taking yin yoga classes, then the class schedule will dictate the time at which you do your yin yoga practice.
Who Shouldn’t Do Yin Yoga?
One key group of people who might benefit from steering away from yin yoga poses are people who are overly flexible without the strength to back that flexibility. These are the types of people who have difficulty feeling a stretch. They cannot activate muscles and may be endangering their joints.
If you are in this group, you will be able to do most yin poses, but they won’t give you any feeling of a stretch because you are already flexible. And as a result, you may excessively stretch ligaments, tendons, and joint capsules to get some sensation.
The problem is that you may cause damage to your joints to the point that you require joint replacement surgery.
And this is why you should also work on strength as you improve your flexibility, even if, to begin with, you aren’t that flexible.
Yin Yoga Poses
Following is a small selection of yin yoga postures for the lower and upper body. You can put these together to form a yin yoga sequence. Or you can use them in relative isolation. You can also use them to counterbalance vinyasa flow style classes, allowing you to stretch the muscles you have strengthened.
Half Butterfly
Sit with your left leg straight and bend your right knee, placing your right foot against the inner thigh of your left leg. If possible, position your right foot close to the groin. If this isn’t comfortable for your right knee, try it with the right foot further forwards.
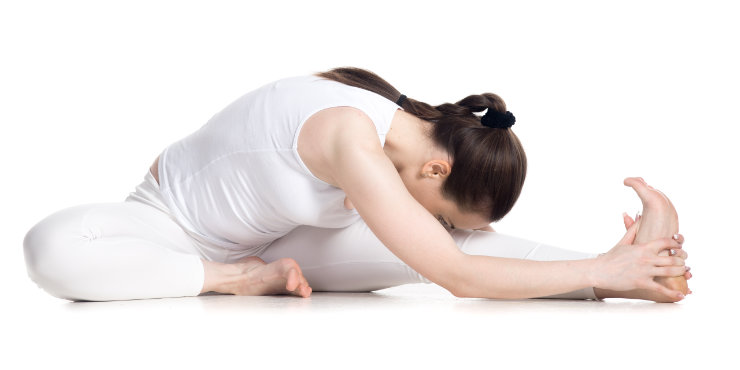
If your right knee (the bent leg knee) is uncomfortable, you can stick a yoga block or suitable substitute underneath it to support it.
With your hands on the floor, slowly and gently fold forward at your hips so that your spine and pelvis tilt forwards as one unit.
You can adjust by slightly rotating your left knee (the straight leg knee) inwards or outwards. You can also adjust by moving your body left or right or even slightly turning your body left or right.
To increase the amount of weight acting to stretch the hamstrings of your left leg, you can try reducing the downwards pressure of your hands on the floor. You may find that your body sinks deeper as a result.
To increase the stretch comfortably, work at gradually decreasing your hands' downward pressure so that you progressively deepen your forward fold.
To anchor one end of your hamstrings and make it easier to relax them, try making your spine long and keep it feeling long as you bend forward. Another option is to activate your abdominal muscles and bend your spine forwards. Then, keep your abs active as you hinge forwards at your hip joints.
Avoid either option if it causes lower back pain.
Repeat on the other side.
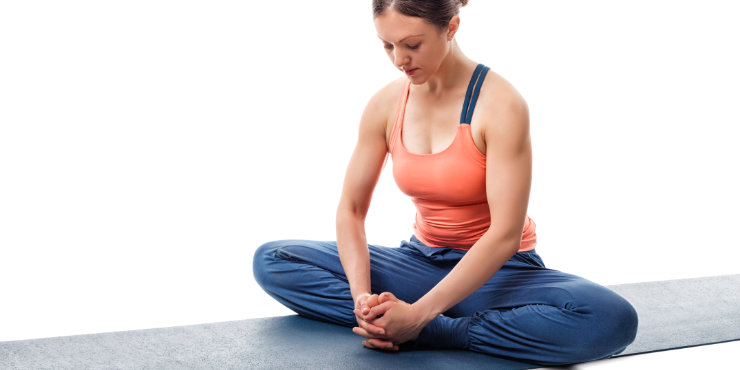
Butterfly Pose
For butterfly pose (or “Full Butterfly”), start in a seated position with the soles of your feet together in front of your hips. Bend your knees out to the sides so that your legs form a diamond shape.
-
One basic option for butterfly pose is to bring your feet closer to your hips. This will stretch your groin muscles more.
-
Another option is to move the feet further forwards. This will act more on your outer hips, the lateral gluteus muscles.
As with half-butterfly, you can place yoga blocks beneath your knees if they are uncomfortable.
An initial variation is to sit upright, with your hands behind you, and allow your knees to sink down.
Try moving your knees slightly forwards or backward to vary the sensation at your hip joint. Look for a feeling of gentle opening.
You can also try slightly lifting your forefeet or your heels to vary the sensation at your knee joints.
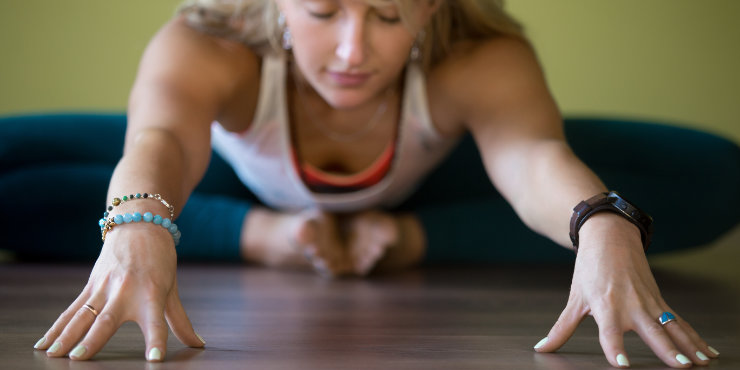
Bending Forwards in Butterfly
Bending forwards in butterfly pose may be a challenge. Go at your own pace. To that end, bending forwards can be made easier by sitting on some yoga blocks.
You could also sit with your back against a wall and use your hands against the wall to gently push yourself forwards.
Another option is to position yourself in front of something you can grab onto (something that won’t move). Holding onto that, use your arms to pull you forwards.
Sit close initially to pull yourself forward gradually in a comfortable range of motion.
You can then repeat the movement sitting further back.
If you can fold forward reasonably easily, you can choose to keep your spine straight or actively bend it forwards.
To add weight to the forward fold, try sliding your hands forwards, away from you, and then pull upwards on your straight arms as if trying to lift them. Apply this upward pull gradually.
Note that you don’t have to lift your arms. Instead, apply an upwards pull as if to lift the arms.
This pose doesn’t offer a lot of gravity-assisted leverage for bending forwards. So you may find it helpful to include more active variations, i.e., deliberately activating the inner thighs or outer hips.
Half Frog
You can use Half Frog to complement either butterfly or half butterfly. In those poses, you externally rotate one or both legs. In this pose, you internally rotate the bent knee leg.
It is similar to the hurdler’s stretch position.
Sit with your left leg straight. Bend your right knee and fold the shin to the outside of the thigh to sit inside your right foot. If possible, position the thighs about 90 degrees apart.
If your right hip (the bent knee hip) is off the floor, use your left arm (the straight leg arm) as a prop for your upper body.
As you practice this pose, you may find that you can work towards having both sitting bones on the floor.
With hands-on the floor, bend towards your left leg, the straight leg. You can keep the spine straight. Optionally as with half-butterfly, you can bend your spine forwards.
To target the groins for more of a stretch, you can turn halfway towards the bent knee leg and bend forwards between the legs. This option can be pretty intense on the bent knee groin, so go slowly.
Avoid this pose if you get knee pain in the bent knee leg.
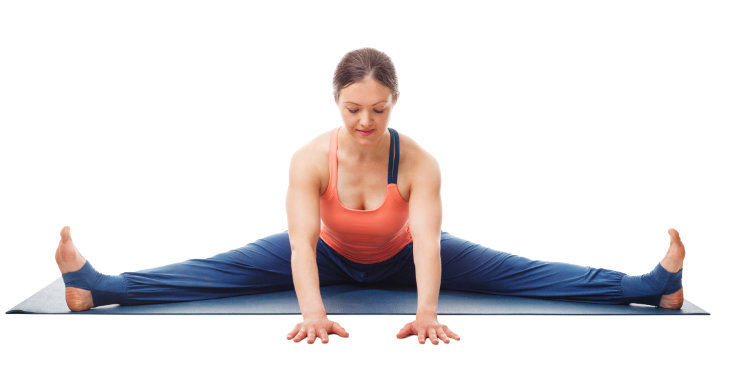
Dragonfly
Dragonfly is another name for a seated forward bend with the legs spread apart.
Sit upright with your legs straight and your legs open to about 90 degrees. Slowly bend forwards between your thighs, using your arms for support as you lower your body.
Keep your knees pointing upwards.
If you can’t bend forwards in this position, try it with your knees bent slightly.
To alleviate any left/right imbalance, you can adjust by slightly turning your pelvis left or right. For a more precise adjustment, use your public bone as a reference. Try slightly turning your pubic bone left or right.
As with the other forward bends, you can gradually reduce hand pressure to add more weight to the stretch. Another option is to slide the hands forwards along the floor. Work to reduce hand pressure by creating an upwards pull on your hands as if trying to lift them off the floor—work at keeping your spine long as you do this. The lengthened spine option can also add weight to the stretch.
As with the other forward bends, you can also try this pose with the spine bent forwards.
As your front fold increases, you may find it helpful to give your legs a slight amount of external rotation.
Sleeping Swan and Swan
Outside of yin yoga, swan and sleeping swan are generally known as pigeon pose. These postures are great for tight hips, particularly the sleeping swan.
You can enter this pose from an all-fours position or from a cross-legged sitting position.
If your back knee is uncomfortable on the floor, use a folded blanket, towel, or other padding beneath it.
From all fours:
From an all-fours position, swing your left knee forwards between your hands. Position the knee slightly to the outside of the left hip. Move your left foot forwards towards the opposite side hand.
From this position, slide the hips, the torso, and the right leg rearwards, as if moving into downward facing dog.
As you move back, your pelvis will sink down.
From cross-legged:
From a cross-legged position, sweep your right leg back behind you. Use your hands to help lift your hips and make them level from left to right. You can work at reaching your right leg back further, allowing your hips to sink as you do so.
As you move your hips back and down, pay attention to your left knee (the front leg knee.) Stop if you experience any knee pain.
For sleeping swan, you can lower yourself onto your elbows, and from there, try sinking your chest down to your leg. Make your spine feel long or deliberately bend it forwards.
The stretch for the front leg can be made less intense by moving your left foot back so that you increase the closure of your left knee. It can be made more intense by moving your left foot forward to the point where your left shin is parallel to the front of your mat (assuming you are using one).
For swan, push your torso upright.
If you’ve been bending your spine forwards, use this opportunity to bend your spine backward, deliberately using your spinal erectors. Depending on how high your hips are off of the ground, you may find it helpful to use a pair of yoga blocks to extend your reach so that you can continue to use your arms to help support the weight of your body.
For both swan and sleeping swan, you may be able to alleviate knee discomfort by pointing your foot and allowing your shin to rotate externally relative to the thigh.
You can also mimic the hip stretch by doing a standing variation of this pose with your front leg resting on a table or other hip-high surface.
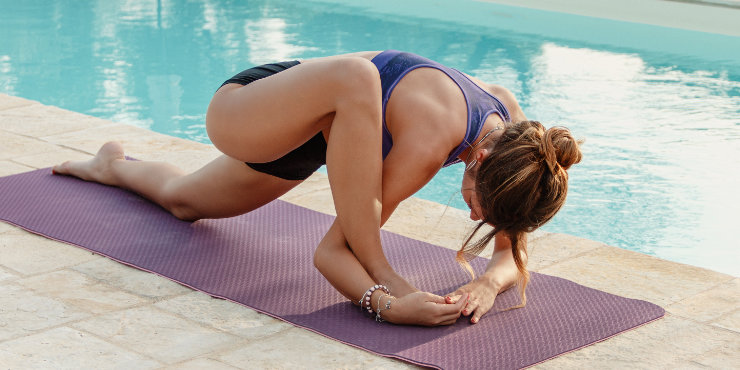
Shoelace Pose
The pose called shoelace can be a great way to stretch the IT band along the outside of the thigh. It can also stretch the outer hips, aka the lateral gluteus muscles.
You can start in a cross-legged position. Use your hands to push your knees towards each other. Alternatively, use your hands to lift your hips, and then move your hips forwards relative to your hips so that your knees move towards each other.
Work towards having your knees stacked with one knee more or less directly over the other. You may find you get enough of a stretch sitting upright. As you get used to the pose, you can deepen the stretch by bending forwards, using your arms to help support the weight of your body as you bend forwards.
Initially, you may find this position is pretty intense, with the feet next to the buttocks. However, you can intensify the stretch by moving the feet further to the sides.
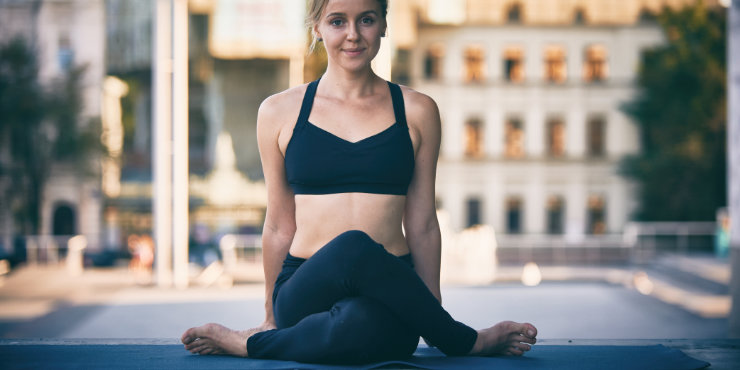
Square Pose
You could think of Square pose as a double swan.
Start in a cross-legged position. Place the ankle of your top foot on top of the knee of the bottom leg. From there, lean back to move your bottom foot forwards far enough so that it is directly under the knee of your top leg.
If you get knee pain in either knee, leave this posture out.
If your knees are okay, focus on allowing your bottom leg's knee to sink towards the floor. And from there, it also will enable the knee of your top leg to sink down towards the foot of the bottom leg.
As you get more used to this position, sit upright. This may provide a good stretch.
To increase the stretch, you can bend forwards. Use your arms to control your descent rate and help bear the weight of your upper body.
To add weight to the stretch, gradually reduce the pressure of your hands on the floor.
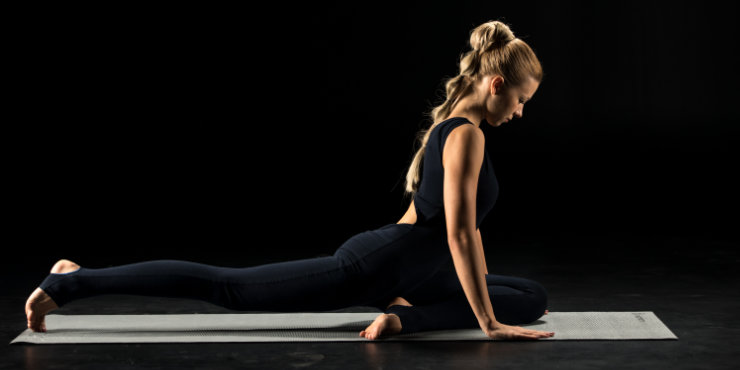
Dragon Pose
In yin yoga, Dragon Pose is given to poses that use a lunging foot position. It’s also the name given to the front-to-back splits.
With one foot in front, knee bent with foot under the knee, and the other leg back with the knee on the floor, you can start with your hands on the floor. The idea in this yin pose is to sink the hips down. From here, you could sink your elbows to the floor to deepen the stretch to the front leg.
An alternative is to bring the torso upright. You can rest your hands on your front knee or on yoga blocks for stability. You shift the stretch to the back leg with the torso more upright.
As with the upright version of swan, you can work at deliberately activating your spinal erectors in the vertical version of dragon to again counter any spinal forward bending you’ve done.
Dragon Using a Wall
You can use Dragon-using-a-wall pose as a substitute or preparation for an advanced hip flexor stretching yin yoga pose called Saddle (shown below).
This variation of Dragon targets the hip flexors with extreme prejudice.
To enter it, position yourself with your right knee against a wall, with the right leg's shin against the wall. Feel free to place a folded towel, folded blanket, or other padding beneath your right knee. Lunge the left foot forwards, with the foot below the knee.
Initially, you can focus the stretch on the left leg (the front leg) by staying on your hands and sinking your pelvis down. If your body allows, you can work towards getting your elbows onto the floor.
Bring your torso upright for the first upright variation. Allow your hips to sink down. Now you’ll be stretching the hip flexors of your right leg.
Lengthen your spine, making it feel long or actively bending it backward. You can rest your hands on your front knee or on yoga blocks.
When first learning this variation and the one that follows, you may find it helpful to activate the foot and ankle of your right leg.
Another option is actively pushing your right foot against the wall. You may find that this makes it easier to sink your hips down. You can then focus on relaxing your hip flexors so that you can gradually deepen their stretch.
For the next upright variation, push your hips back towards the wall. You’ll have to move your front foot back as you do this. You may find it easier to put your hands on the floor and then push your hips to the wall, repositioning your front foot as necessary. From there, bring your torso upright. To get your hips right against the wall, you’ll have to position them to the inside of your right foot. To deepen the stretch, try to get your back to the wall.
You will have to use the front leg to push your hips back and push them back. As you get more comfortable in this position, you can focus on relaxing your right leg's front. Actively make your spine long.
A Yin Stretch for the Front of the Shoulder
This passive floor stretch can stretch the front of the shoulder with the arm out to the side.
Start by lying on your belly with one arm out to the side with the palm facing downwards. Position the arm at 90 degrees to your body with the elbow straight. Next, slowly roll the opposite side of your body off the floor. You can use the other hand to help.
Bend your knees towards your chest.
For now, keep your button knee and foot on the floor. Keep your knees and feet together. This position may be a stretch for some people.
When first trying this stretch, proceed to this point, hold it, and then repeat on the other side.
You can lift the top knee and point it to the ceiling to deepen the stretch while keeping the foot on the floor. Again, go slowly.
You can deepen the stretch even more by then pointing the bottom knee up so that both feet are on the ground with the knees pointing upwards. At this point, the “goal” can be to work the topmost buttock towards the floor.
An option after each side is to rest with your chin on the back of your hands with legs slightly spread apart and knees and feet pointing outwards. It should feel enjoyable.
A Yin Stretch for the Back of the Shoulder
This yin posture stretches the back of the shoulder.
Start by laying on one side. Reach the bottom arm forwards along the floor so that it is at about 90 degrees to your body. Turn the palm so that it faces upwards.
From here, gradually roll the front of your legs and hips to the floor, and then using your free arm for support, gradually roll the front of your ribcage towards the floor so that the stretched arm crosses in front of your upper chest. You might want to adjust your arm position to cross your arm in front of your throat.
A Note on Yin Style Yoga Shoulder Stretches
When doing yin-style shoulder stretches, it can be easier to relax your shoulders if you learn to spread your shoulder blades and retract them to gain more awareness.
When you have some basic shoulder blade awareness, you may find it helpful to move your shoulder blade inwards towards your spine when stretching the front of the shoulder. Likewise, you can try moving your shoulder blade outwards, away from your spine, when stretching the back of the shoulder.
Child’s Pose
One way to end a yin practice or begin it is with Child’s Pose.
Start in a kneeling position. If your hips don’t touch your heels, you can place a yoga block or two between your bum and heels.
From this position, enter into child’s pose by bending forwards and resting your forehead on the floor. If your head doesn’t reach the floor, you can use yoga blocks again or put your elbows on the floor and rest your chin or forehead on your hands.
This pose can be uncomfortable with the forehead on the floor, so you could pillow it with your hands or use a towel or yoga block. Another option that includes a free neck stretch is to turn your head to one side. (Repeat for the same amount of time on the other side.)
References
Is it Normal to Feel Sick After Yoga Class? | YogaClub.
Can You Really Use Yoga for Weight Loss? We Asked the Experts How to Do It Properly.
Yin Yoga & Restorative Yoga: What is the Difference? | Arhanta Yoga Blog
10 Reasons to Make Time for Yin Yoga When You're Too Busy.
12 Yin Yoga Poses to Awaken Dormant Energy & Recharge Your Practice
Disclaimer
The contents of this article are provided for informational purposes only and are not intended to substitute for professional medical advice, diagnosis, or treatment. It is always recommended to consult with a qualified healthcare provider before making any health-related changes or if you have any questions or concerns about your health. Anahana is not liable for any errors, omissions, or consequences that may occur from using the information provided.