Many yoga poses are very familiar and common, as they are used in other forms of exercise such as fitness, pilates, or simply because human bodies naturally bend into those positions.
Practice makes progress therefore we outlined yoga poses or asanas (Sanskirt term) for complete beginners to get started with yoga safely and efficiently.
A Yoga Primer for Beginners
Rather than going to yoga studios, you can try some beginner yoga poses by yourself, taking time to work gradually to understand the final goal of each asana.
-
One basic idea you can apply when doing almost any yoga posture is to create length or space. In general, that can involve making your spine feel long. You can apply this same principle to your limbs. Make your limbs lengthening.
-
Another constructive idea is to create stability. Stability can come as a side product of length. Still, it can also come from deliberately stiffening joints or regions of the body or from slowly activating particular muscles or all the muscles together.
-
Also, notice pressure at points of contact. Being aware of floor contact can be very important when balancing or staying balanced.
When first getting used to yoga asana (asana is another name for posture or pose), work towards holding the final position for five long and smooth breaths or, failing that, a slow ten count. You can, of course, choose to hold some poses for longer.
Breathing
As a beginner, a simple breathing option is to breathe naturally through your nose. Focus on what you are doing and allow yourself to breathe. With time, many yoga practitioners tend to adopt mindful breathing techniques and transfer them into their day-to-day life.
How Often Should a Beginner Practice Yoga?
When first getting into yoga, a reasonable goal is to practice three times a week. At a bare minimum, practice twice a week. If you enjoy yoga so much that you want to practice it all the time, try giving yourself at least one day off a week.
How Long Should a Yoga Session Last?
A yoga session can last between 20 minutes to two hours or longer. What may be more important than the length of time is the quality of the time. When doing a yoga session, focus on what you are doing, rather than how long it is taking you. Saying that, restorative, yin and hatha yoga focus on long asana holding.
Do you need a yoga mat or yoga props?
The main reason for having a yoga mat is cushioning and providing grip, particularly when sweaty. You should be fine for this basic yoga poses as long as you have a comfortable non-slip surface to work on.
Some props that may be helpful, mainly if your flexibility is limited, is a pair of yoga blocks. But if you don’t have those, you can use a sturdy chair. A belt or yoga strap may also be helpful though you won’t need one for the poses included here.
Standing Yoga Poses for Beginners
Variations of Mountain Pose
Mountain pose is usually done with the knees straight, feet together, and arms by your sides.
One of the simplest things you can do in this beginner’s yoga pose is alternately to lengthen and relax your spine repeatedly. So that you don’t have to worry about balance, you can practice this in a variation with feet a comfortable distance apart and with knees slightly bent.
Starting from the top and working down your spine, pull your ears back and up. The goal here is to make the back of your neck feel long. To that end, you can adjust how far back and up you pull your head. You can also vary the amount of chin lift. Try lifting or lowering your chin, and then use the position that makes the back of your neck feel comfortably long.
A side effect of pulling your head back and up is that your chest will lift and that in turn will lengthen your abdomen. You may find that it also makes your thoracic spine feel long. Gently pull your ribcage up, away from your pelvis, to make your lumbar spine feel long. In addition, try moving your sacrum downwards just far enough that your lower back feels comfortably long or “open.”
Once you get the hang of making your spine feel long, repeat the action, alternately lengthening it and relaxing it. Then try the same with your knees straight. Lengthening and then relaxing your spine repeatedly is something you can do in the standing poses that follow.
Shifting your Weight Forwards or Backwards
To improve your body awareness, play with shifting your weight forwards and backward.
Stand with feet a comfortable distance apart and knees slightly bent. Shift forward enough that your toes and forefeet press down with even pressure. Your heels should only lightly touch the floor. Then shift back so that your forefeet and heels press down with evenly distributed pressure. You may find that your toes relax. Repeat a few times, moving slowly and smoothly, and pausing with weight forwards or backward.
You could try this while on one foot. Shift your weight to one foot. Lift the other foot just enough that it is clear off the floor. Practice shifting your weight forwards to your forefoot and toes. Then move back a tiny amount so that your forefoot and heel press down with even pressure.
Whether on one foot or two, another option when shifting back is to move all the way back to press down the back edge of your heels. Note that you may have to wave your arms to stay balanced in this position.
A Simple Tip For Balancing On One Foot
It is much easier to balance and stay balanced with your weight shifted forward, especially if your toes press down. And so, keep your weight shifted forwards so that your forefoot and toes press down into the floor when doing any single leg balancing pose.
Standing Side Bend
You can use a side bend to stretch the side of your waist and the side of the ribcage. This pose can also stretch the outside of one hip and the inside of the other.
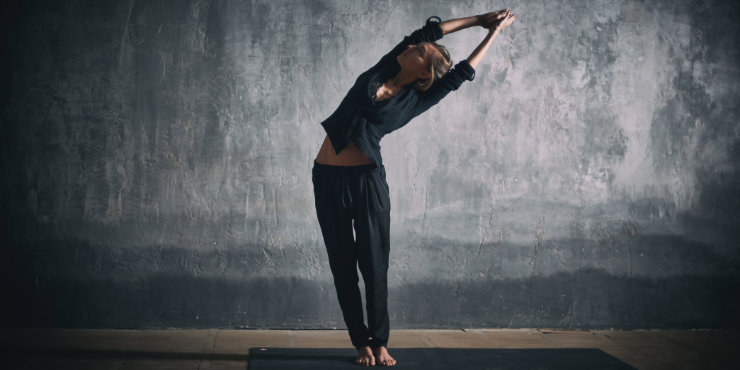
Start with your feet a comfortable distance apart with knees straight. (You can work towards doing the pose with your feet together!) First, lengthen your spine. Then push your hips to the right as you bend your spine to the left. Optionally, reach one arm and then the other up and to the left, past your head, with straight elbows. (You can work towards touching your palms together if you choose!)
Rather than just holding the pose, you can try to push your hips further to the right while lengthening your spine (and arms) to the left each time you inhale. Then relax while holding the shape of the pose while exhaling.
Work at slowly and smoothly lengthening and then relaxing.
Repeat a few times, and then switch sides.
Standing Yoga Spinal Twist for Beginners
A basic standing pose for beginners is the standing spinal twist, based on mountain pose.
Stand in a modified mountain pose with the feet about hip-width apart, with knees straight and arms by your side.
Turn your pelvis to the right while keeping your feet and knees pointing straight ahead. Turn your ribcage and then your head further to the right. Hold this position for five or so breaths or a ten count. Next, keep your ribcage and head turned to the right, and turn your pelvis to face the front. Hold this position for five to ten breaths and then rest.
You might choose to repeat this a few times on one side and then switch sides. Or you can alternate sides each time.
Chair Pose
Chair pose isn’t a pose done while sitting in a chair. Instead, it is a pose that looks like you are sitting in a chair.
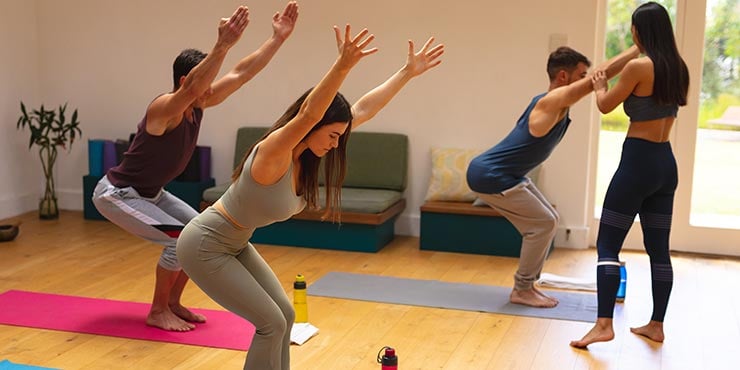
Start with your feet about hip-width apart for this beginner's variation. Lengthen your spine. Push your hips back and bend your knees to about 90 degrees. Keep your weight centered between forefeet and heels, or shift it forward to forefoot and toes.
To make your legs feel more solid and stable, try pressing your forefeet down into the floor without allowing your heels to lift. Reach your hands forwards for an easy arm variation. Or reach your arms overhead with elbows straight for a more challenging variation.
Triangle Pose
The triangle pose is a classic hatha yoga pose found in the Asthanga yoga standing series.
Step your feet about a leg's length apart. Turn your right leg out about 90 degrees and keep both knees straight. Push your hips to the left and tip your upper body (pelvis and ribcage) to the right. Rest your bottom hand on your shin, or if you have one handy, a yoga block or, failing that, a chair. If you are flexible enough, you can also rest your hand on the floor but, in all cases, work to keep your torso directly over your right leg.
Lengthen your spine, especially your neck. Brace your legs. Lift your bottom hand clear of your shin (or yoga block, chair, or floor).
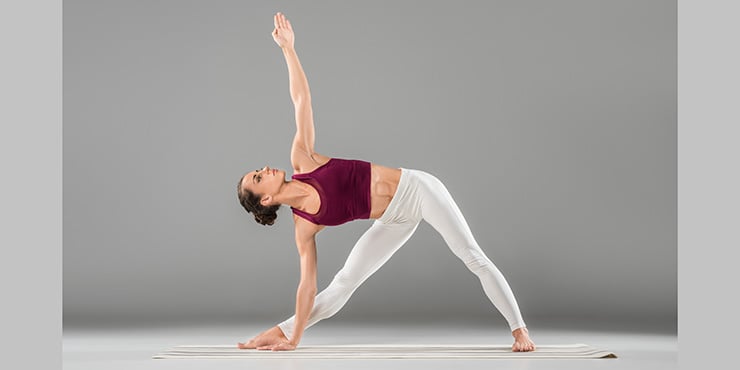
To brace your legs so that lifting your hand is more accessible, press your forefeet down firmly into the floor without allowing your heels to lift and without shifting your body. Another option for bracing your legs is to push your heels down firmly into the floor. There should be an accompanying activation of your leg muscles in either case.
To increase the challenge with the hand lift, reach one or both arms to the right, past your head.
To stand, you can relax your arms and bend your knees. As you get used to this pose, you can try exiting it by standing using the strength of your legs while keeping your knees straight. You can make this more of a challenge by keeping your arms reaching past your head as you stand.
Another option, particularly when first trying this pose is to bend one or both knees prior to standing.
Tree Pose
While standing upright, shift your weight forwards to your forefeet and toes, and then shift to one leg and lift the other leg. Use your hand to grab your ankle and place the foot against the thigh of your standing leg as high as possible. You are now standing in tree pose, Vrikshasana.
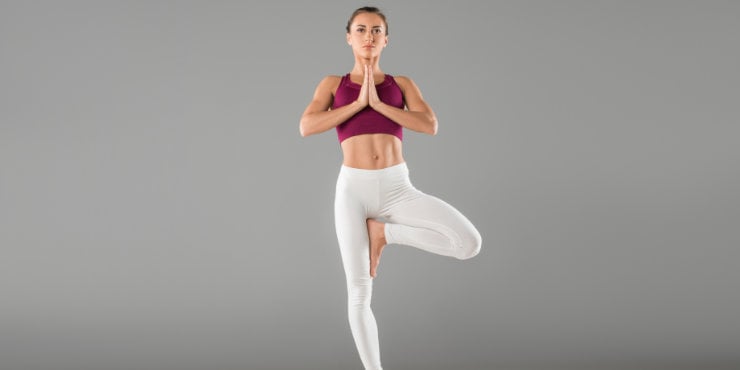
Gradually press your foot against your inner thigh and release your hand. Bring your torso upright and lengthen your spine. You can put your hands together in a prayer position or reach them out to the sides or reach them up, past your head.
An option that can make this pose a bit more beginner-friendly is not to touch your foot to your inner thigh. Instead, stay balanced on one foot while the other knee is bent and pointing to the side with the foot lifted but not pressing against the standing leg.
This option can be more challenging in that you have to use the muscles of your lifted leg to keep the leg lifted. However, it can make balance easier. For either option, keep your weight forwards so that your standing leg, forefoot, and toes press down firmly on the floor.
Using your Eyes to Stay Balanced
When doing standing poses, particularly when balancing, fix your eyes on one spot. Keep your eyes still.
The technical term for gazing point is Drishti. You may find that a helpful Drishti point is located forwards and down during standing poses.
Experiment with how far forward and down your gaze goes and use a gazing point that makes it easier to stay balanced. I tend to find gazing downwards at a slight angle makes balance easier. If you find the right gazing point, you may find that your balance feels surprisingly stable.
Modified Eagle Pose for Beginners
Eagle pose can be considered a counterpose to Tree pose. It generally involves a bind for the legs as well as the arms. A bind is where one part of the body works against another part. This modified version includes a bind for the legs, but it is modified.
(The full version is shown in the picture below)
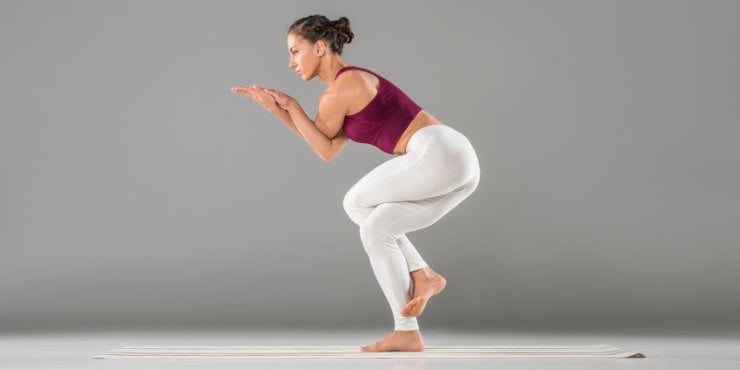 Bend both knees and push your hips back down above your knees from a standing position. Shift weight forwards to forefeet and toes. Then shift to one foot and cross the thigh of your unweighted leg across the thigh of your standing leg. You might need to use your hands to help push your thighs towards each other. The foot of your top leg will probably be reaching out to the side.
Try to bring the foot of your lifted leg into contact with the shin of your standing leg. Work towards holding this position for five long slow breaths or a slow ten count. Rest if you need to, and then repeat on the other leg.
Standing Forward Bend
A dream of many beginners, or simply people in general, is to touch their toes while their knees are straight. You can work towards that ability in standing forward bend, also called Uttanasana.
Use a chair or yoga blocks for this variation.
Stand with your feet about hip-width apart with knees straight. Slowly tilt your pelvis and ribcage forwards, hinging your upper body towards the floor and your thighs. Place your hands on the edge of your chair or yoga blocks or the floor if you can reach it. Use your arm muscles to press your palms or fingertips into the seat of your chair without allowing your upper body to lift or shift forwards. Relax and repeat a few times.
Notice how your thighs' back relaxes when you press your hands down. Notice how your thighs re-activate when you rest your hands, mainly if you try to keep your torso still. Take a rest for a few moments, and then try standing forward bend again.
Place your hands on your chair again. This time, focus on the backs of your thighs. Try to activate the backs of your thighs deliberately, pause, and then relax them. You may find that when you activate your thighs, your arms relax. When you relax your thighs, you may find your arms reactivate. Try to allow your forward bend to increase when the backs of your thighs are relaxed.
Optionally, try to deepen your forward bend while the backs of your thighs are active. When standing back up, try to deliberately activate the muscles at the back of your legs so that you can use them to stand back up.
Floor Based Poses
Modified Downward Facing Dog Pose for Beginners
In a full downward-facing dog adho mukha svanasana, the knees are straight, with the heels ideally touching the floor. In this modified version, we’ll keep the knees on the floor so that you can focus on the actions of the arms, spine, and legs without having to work around flexibility constraints.
Start on all fours with your hands on the floor ahead of you. Spread your fingers. Use your hands as if trying to push the floor forwards, away from you. At the same time, press your forefeet down and use them to push the floor rearwards. Your arms and legs should feel active.
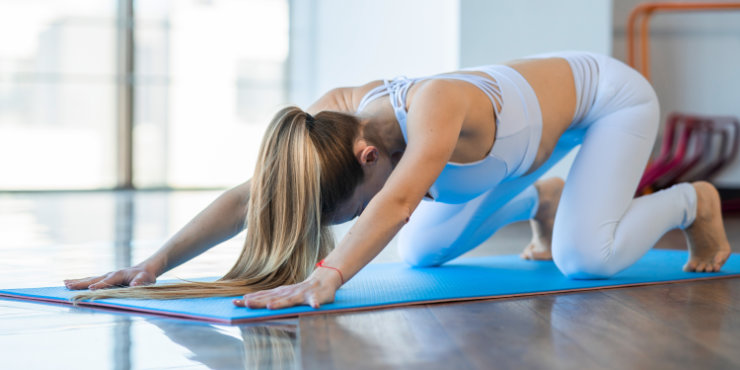
Keeping your arms and legs active, move your torso backward, away from your hands, so that when viewed from the side, your spine and arms form one line. Make the back of your neck feel long, and then try to maximize the distance between your hips and hands. Make the rest of your spine feel long, lengthening it away from your hands. Gaze at a point on the floor below your hips as a starting point. Continue to push your hands forwards and your feet back. Slowly relax and rest on all fours.
Repeat three times, working towards holding for five slow breaths or a slow ten count. One of the chief benefits of this pose is that it is like an inversion because the head is below the hips. You may find that even this simple variation is quite calming, mainly if you fix your eyes on one point.
More Downward Facing Dog Pose Variations for beginners
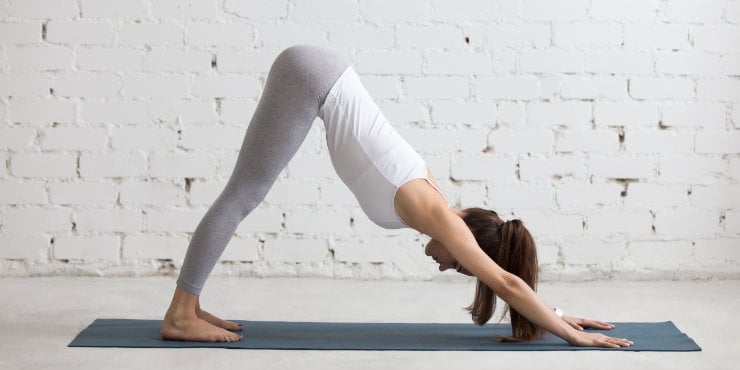 From the previous version of the downward-facing dog, you can try the same actions with the knees lifted but still bent. Here again, work at pushing your ribcage back, away from your hands. At the same time, continue to press forwards with your hands and back with your feet.
The next version can be with your knees straight but with your heels lifted as high as possible. Finally, you can use the same actions while sinking your heels to the floor with your knees straight. To get your heels closer to the floor, focus on creating an upwards pull on the fronts of your feet.
Plank Pose
 Before the plank pose, a straightforward shoulder action that you can practice while sitting upright is moving your shoulders forward. Notice how, as you do so, your shoulder blades spread apart. Relax and repeat a few times. Then try it with your arms reaching forwards. Note the feeling of space you get between your shoulder blades when you spread them. Also, notice how your arms seem to become longer when your move your shoulders forward (with the arms reaching forwards.)
Now on all fours, with wrists under your shoulders and knees under your hips, you can do the same thing, spread your shoulder blades. Your ribcage will lift as a result. Pull your ears away from your shoulders so that the back of your neck feels long. With the back of your neck long and your shoulder blades spread apart, step one leg back at a time without allowing your pelvis to lift or move. Work towards holding a plank for five breaths or a slow ten count hold, then release and rest for a few moments. Repeat two more times.
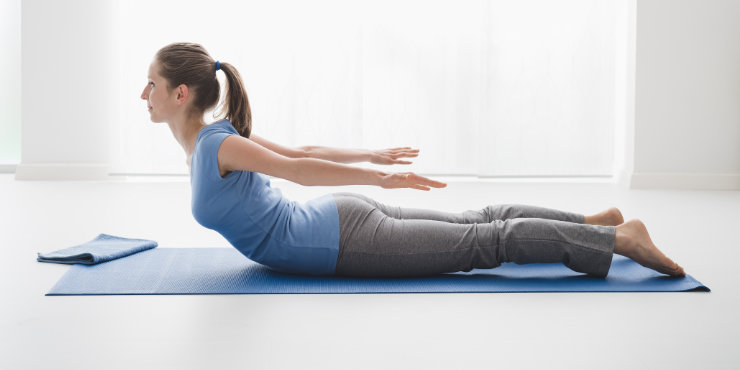
Locust
It can be important to keep your spinal erectors active when getting into poses like an upward-facing dog, which is common in vinyasa yoga, flow yoga, power yoga, and ashtanga yoga. These muscles run up the back of the torso on either side of the spinal column. One way to get a feel for these muscles and exercise them simultaneously is with the Locust pose.
Lie on your belly with your arms and legs straight and your arms beside you. Lift your chin off of the floor slightly. Do it slowly and notice the sensation at the back of your neck as the muscles there activate to help lift your head. You can look down, bringing your chin to the chest and thus making the back of your neck feel long. You can also look up slowly, bending your neck backward.
Repeat this three or more times to feel for it, resting in between sets. Work towards holding the head lifted position for five long slow breaths or a slow ten count.
Next, after lifting your head, reach your legs back with your knees straight so that your legs feel long. Then, gradually raise the front of your ribcage off of the floor. Bend it backward so that it slowly peels off of the floor. Your legs may lift, and that’s fine. But try to keep them on the floor.
Slowly lift and slowly lower, repeating three to five times. Work towards holding the lifted position for five or more long slow breaths or a slow ten count.
While holding the lifted position, notice the sensations along your spine and at the backs of your ribs. To raise your ribcage higher, work at increasing the backward pull on the backs of your ribs (towards the backs of your hip bones).
Resting
At the end of yoga practice, it’s essential to rest. This is a chance to relax in general. But in terms of yoga practice, it is a chance for your body and mind to assimilate the experiences of the poses you’ve just done. For the resting pose called corpse pose, simply lie on your back with arms and legs slightly spread out and palms facing upwards. Initially, you may find that your mind is quite busy.
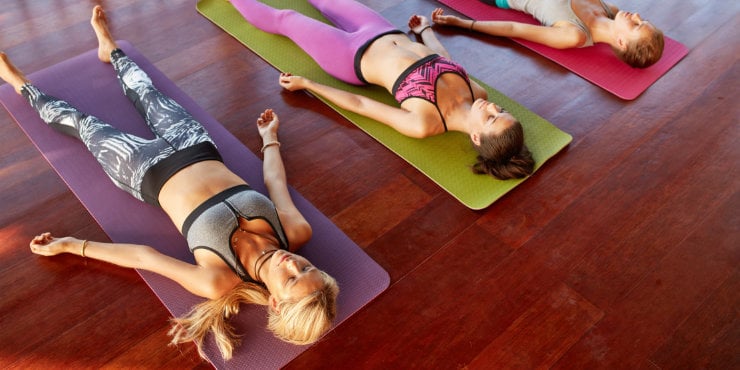
But you may also find that as you practice more, when you finally get to the corpse pose, your mind is silent. Give yourself at least five minutes in a corpse pose if time allows. Afterward, work at carrying the calm you get from doing yoga to life outside your yoga pose practice.
References
Yoga for Everyone: A Beginner's Guide - Well Guides - The New York Times
10 Easy Yoga Poses for Beginners to Build Strength, Flexibility, and Mental Clarity
Yoga for Beginners: The Ultimate Guide to Starting Your Practice
Yoga For Beginners: Poses and Benefits – Forbes Health
Disclaimer
The contents of this article are provided for informational purposes only and are not intended to substitute for professional medical advice, diagnosis, or treatment. It is always recommended to consult with a qualified healthcare provider before making any health-related changes or if you have any questions or concerns about your health. Anahana is not liable for any errors, omissions, or consequences that may occur from using the information provided.